
|
|
|
||||||||
|
|
|||||||||
| Home | Forums | Register | Gallery | FAQ | Calendar |
| Retailers | Community | News/Info | International Retailers | IRC | Today's Posts |
 |
|
|
Thread Tools |
|
|
#1 |
|
.:::::Turok's Hera Arms Glock Kit Modification (Picture Intensive):::::.
Finally finished my mini-sub project with my Tokyo Marui G18C and AABB Hera Arms Glock Kit. I wanted to create a fun, light weight submachine gun that offers practicality and speed (this will be my gaming gun) since I’m a pretty small guy. As users of the Hera Arms (HA) with G18C will notice, it is difficult to push down on the magazine release or switch between semi/auto due to a lack of cut out to accommodate the fire selector. I wanted to challenge myself to mod the kit in order for me to
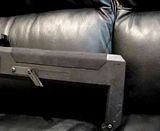
1. Switch between semi and full auto 2. Push down the slide catch 3. Charging handle to cycle back and forth Even though the charging handle on the RS HA kit does not cycle nor does it have/need the cut out for the fire selector, I wanted to do it for fun. Here are some pictures of the modifications I completed in order to achieve the objectives I had in mind. I visited my local metal store and purchased a piece of light weight aluminum. After hours of dremelling, filing, sanding, I custom made (everything was done by hand) a block to sit behind the rear glock sight. It was a challenge to drill a half/crescent hole that fits directly on the charging handle rod on the HA kit, but it had to be done.       Following completion of the aluminum block, I installed a piece of hard rubber to cushion the blow from the rear sight as the slide cycled. Since the rear sight as held by a single screw in the slide, I needed the rubber to cushion the impact to prevent the screw from loosening   Next, the aluminum block was secured at a specific location on the recoil rod. It is imperative that it doesn’t sit too rearward or else it will prevent the charging rod from cycling back enough to chamber the next round. Two holes were drilled in the aluminum block to accommodate the conical shape of the screw, and a hole had to be drilled and tapped directly onto the charging rod to match the threads of the screw.      In order for the fire selector to be accessible, there are many users out there that cut out a hole on the HA frame. I adopted a similar approach; however, many users cut an oval/circular opening as it looked out of place (ugly in my opinion) compared to the contours/style of the gun. Instead, I made linear cuts with curved corners to match the overall style of the gun. Even though the frame looks better without any cuts at all, but in order to access the fire selector, I had to make sacrifices. Hence, a square opening was carved to accommodate the fire selector and slide catch.     Since I had to completely open both halves of the HA kit, the padding had to be completely ripped apart and a new foam piece (purchased for $2) had to be cut accordingly and applied.      Here are some pictures of some steel internal hammer sets I purchase. G17 on the left and G18C on the right, both for Tokyo Marui glock pistols. The G18C steel hammer set was a complete drop in with no modifications required (thank god!).      After all is done, the kit was ready to be reassembled. Some grease was applied to the charging rod, and all screws were locktighted.              Here are some videos of the gun in action, stay tuned for my next 2 projects!   
Last edited by turok_t; October 4th, 2017 at 19:35.. |
|
|
|

|
|
|
#2 |
|
Wow! That'd be really useful in a game! .... :P
|
|
|
|

|
|
|
#3 |
|
|

|
|
|
#4 |
|
mrlexmark
|
MY HERA ARMS! WHAT DID U DOO!?
I Kid.. Great work, needs an RVG though. Bring it in next time you come by the shop. |
|
|

|
|
|
#5 |
|
will always be Mike Litoris in our hearts
|
Great job! Thanks for the write up. Its now way past my bed time. That block of aluminum must have been a pain to fit.
|
|
|

|
|
|
#6 |
|
What brand are those steel parts?
|
|
|
|

|
|
|
#7 |
|
Mr. Silencer
|
Nice attention to detail.
Question: What is the purpose of hooking up HPA to each mag? What happens if you empty your mag, do you have to disconnect the line, eject mag, insert new mag and re-attach line? |
|
|

|
|
|
#8 |
|
Cobalt Caliber
|
Very nice, I can't help but think it looks sorta like the Magpul FPG, but then again this is probably where magpul got there inspiration from.
|
|
|

|
|
|
#9 |
|
Administrator
|
No magpie got their idea from an old gun made by ares I think. It's in the robocop movies.
|
|
|

|
|
|
#10 |
|
Tys
|
I don't really dig the setup...but that's an impressive amount of work to put into it. It's nice to see someone else's ideas.
Instead of a metal block...I would have been tempted to use a rubber stopper (like a bottle stopper from chemistry class). They're just a dollar or two from Rona and come in all sorts of shapes/sizes. They can be turned down to whatever diameter you need by just mounting/chucking it on a screw...spin it with a drill and use sandpaper to "turn" it down to size. Simply mounted it on a screw and tapped that into the rod...positioned to sit more behind the slide than just the rear sight. No need for profiling or anything like that...very light setup as well. Neat though |
|
|

|
|
|
#11 |
|
Division
|
Neato, I've always wanted to do that. Unfortunately the real thing doesn't crack open like yours.
Robocop: |
|
|

|
|
|
#12 | ||
|
AIP
Quote:
Quote:
|
|||
|
|

|
  |
|
||||||
| Bookmarks |
| Thread Tools | |
|
|
 |