thanks to discussion in Cico's thread i decided to make my own thread to be fair to Cico, and not de-rail his thread any further.
in this thread i will be showcasing the hopup tracer mod i put together. i will have pictures showing the assembly steps in detail, so 56k.. enjoy.
this is the second time i have tried to get this mod running, the first time was before Op Rhino. unfortunately my mod got chewed up during Rhino as i had to disassemble my rifle in the field to trouble shoot a feeding issue. turned out that the MadBull barrel i was using was shedding it's internal lining...(avoid these barrels) and no i did not have a spare barrel. i spent the evening running just my pistol (the single most kills i have ever had during any game.. go figure..), until a fellow seal was kind enough to lend me his pump shot gun(thanks man your a game saver!)
alright, on with the mod!
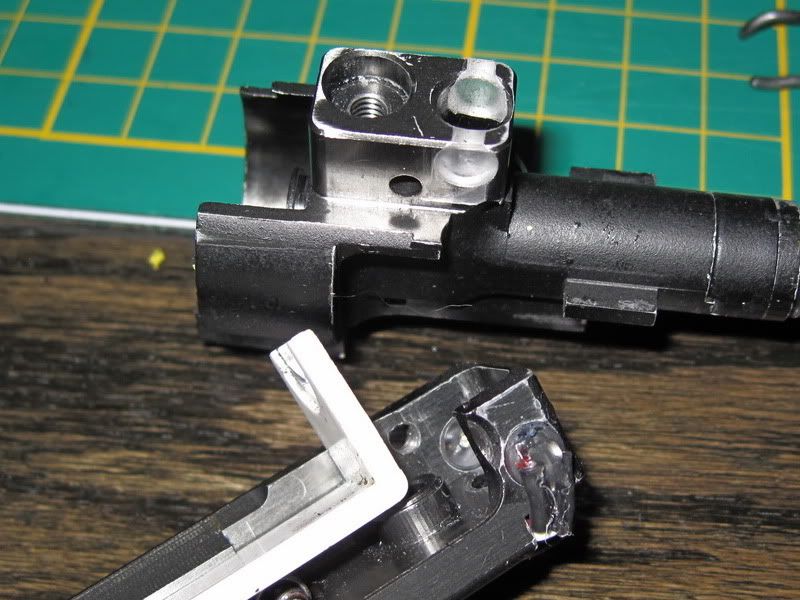
the way i set this up is quite a bit different than a mod done to a normal TM style hopup housing, as i'm running a ProWin 8mm two piece gearbox. since the hopup is integrated with the gearbox upper, i had to come up with a means to be able to disassemble the gearbox when needed without having to remove the tracer mod.
if i were to simply stick the 5mm LEDs into the holes i drilled on the side of the hopup housing, it would have worked fine, but i would not be able to disassemble the gearbox without removing the LEDs first. this was not something i wanted to deal with, so i shortened the LEDs on my Mill.
the first step was to remove the small shoulder on the base of the LEDs to give me a better surface to mount it in my chuck for the next step.
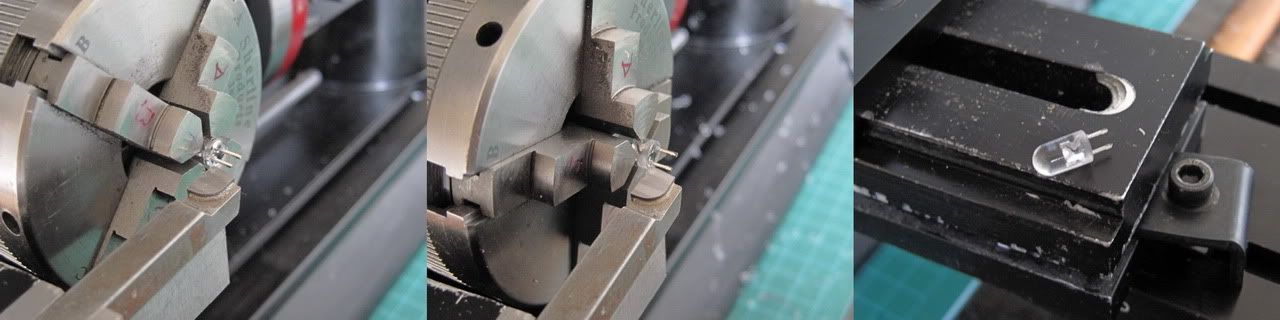
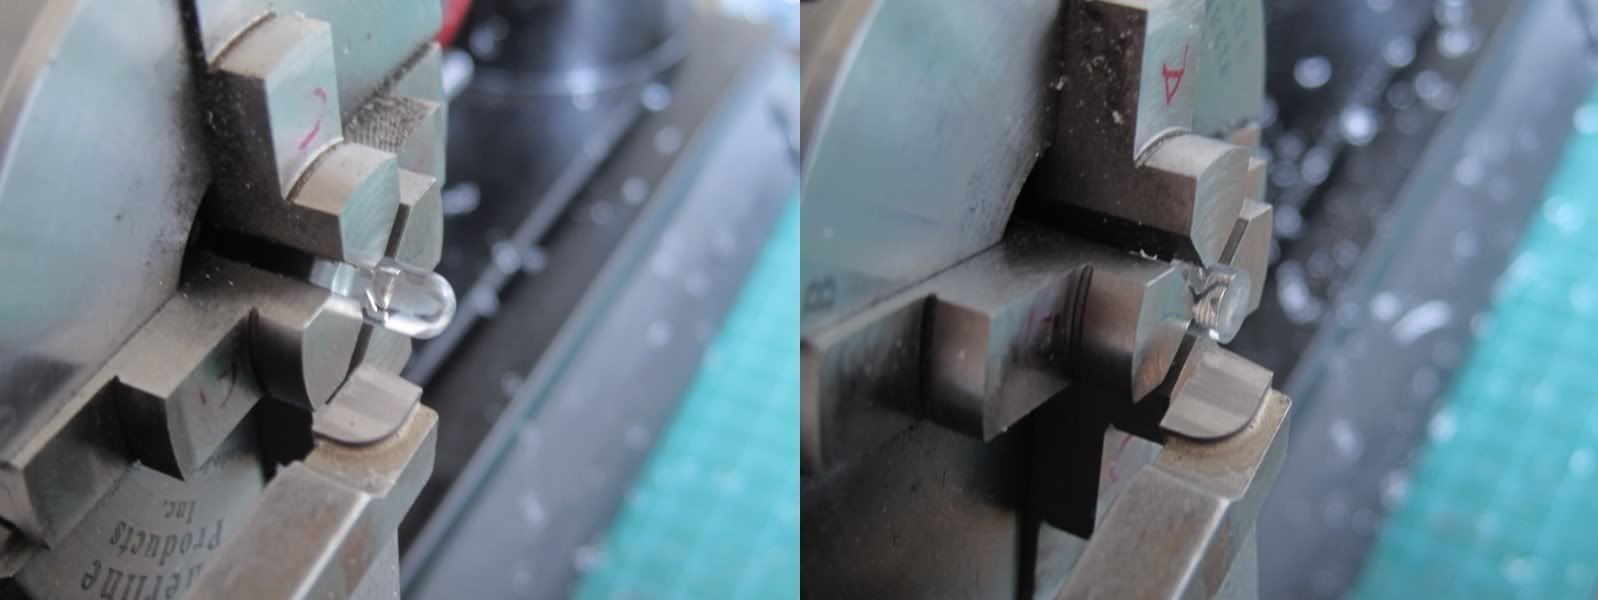
with the shoulder removed i flip the LED over and cut down its length. i left a .0175 layer of acrylic as not to cut into the diode, and to have a surface to polish afterwards.
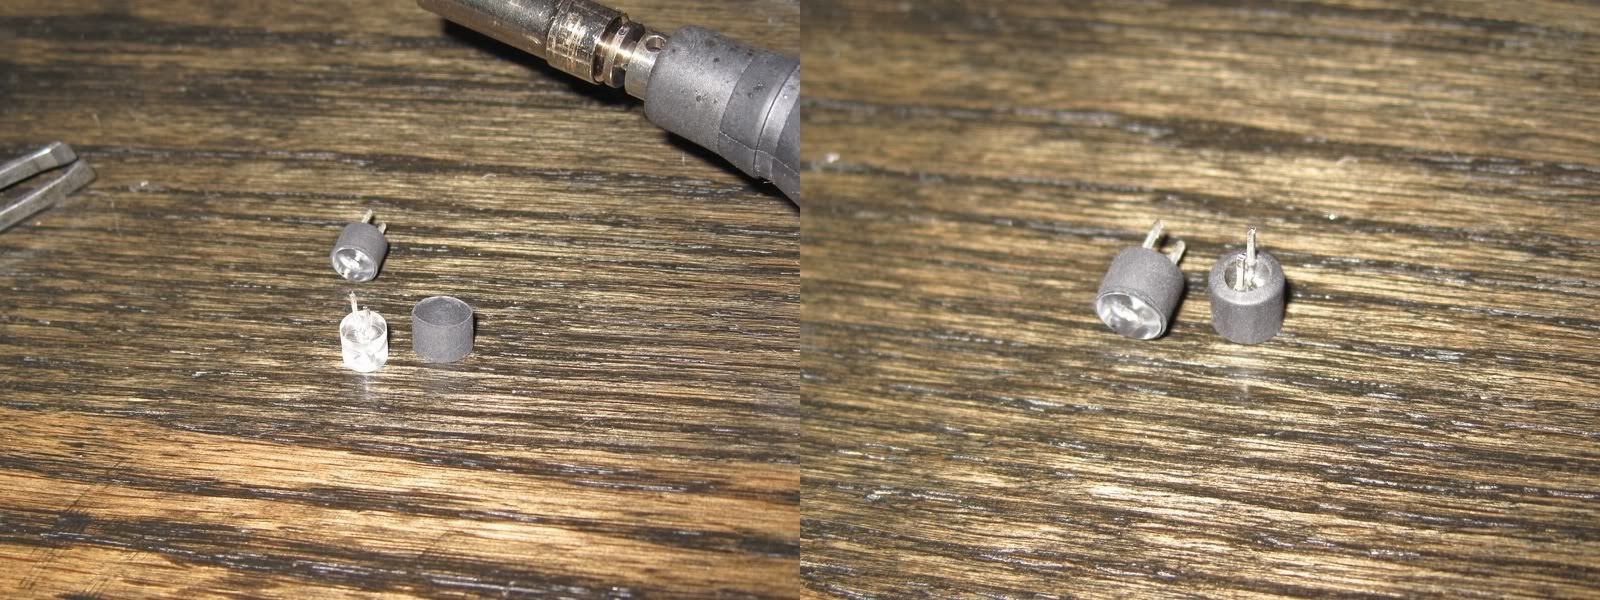
after polishing the cut surface to a nice clear finish, i put shrink tubing around the LEDs to help them fit snug into the holes i drilled in my hopup housing, as well as reduce the amount of light that might leak out the sides and back of the LEDs once installed.
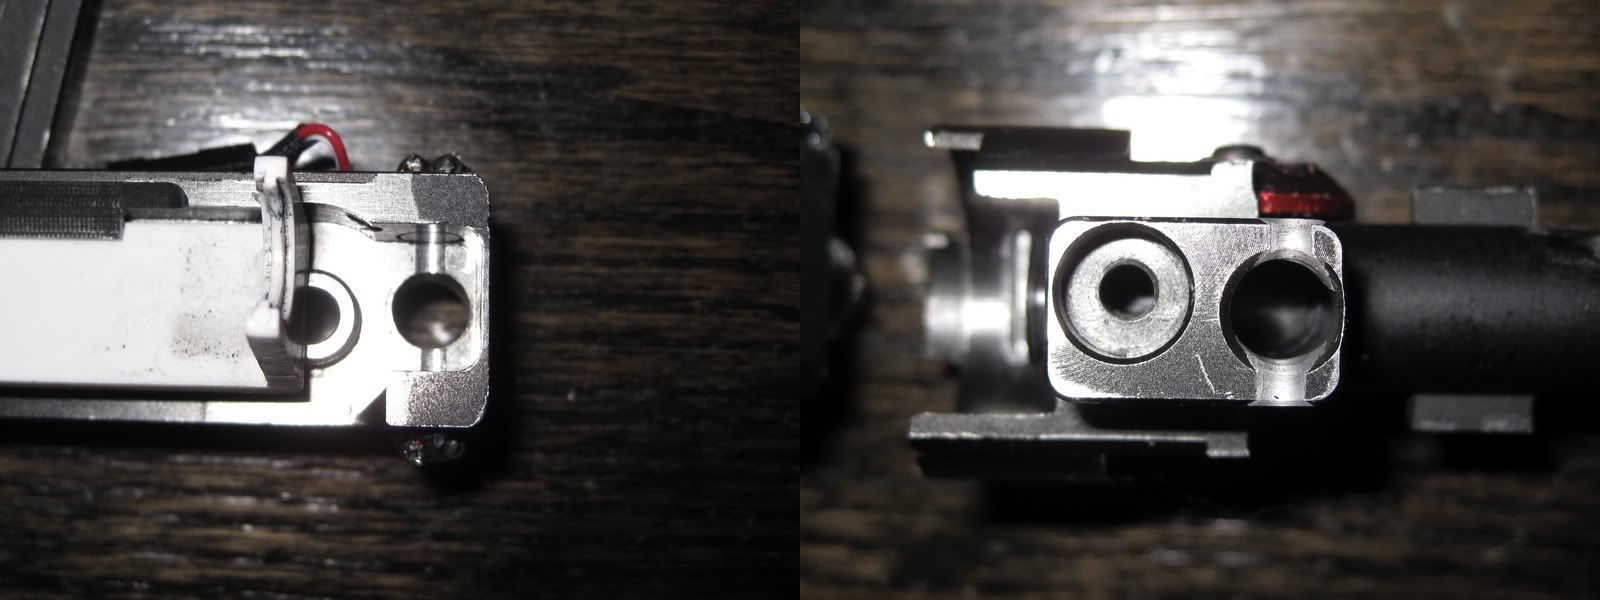
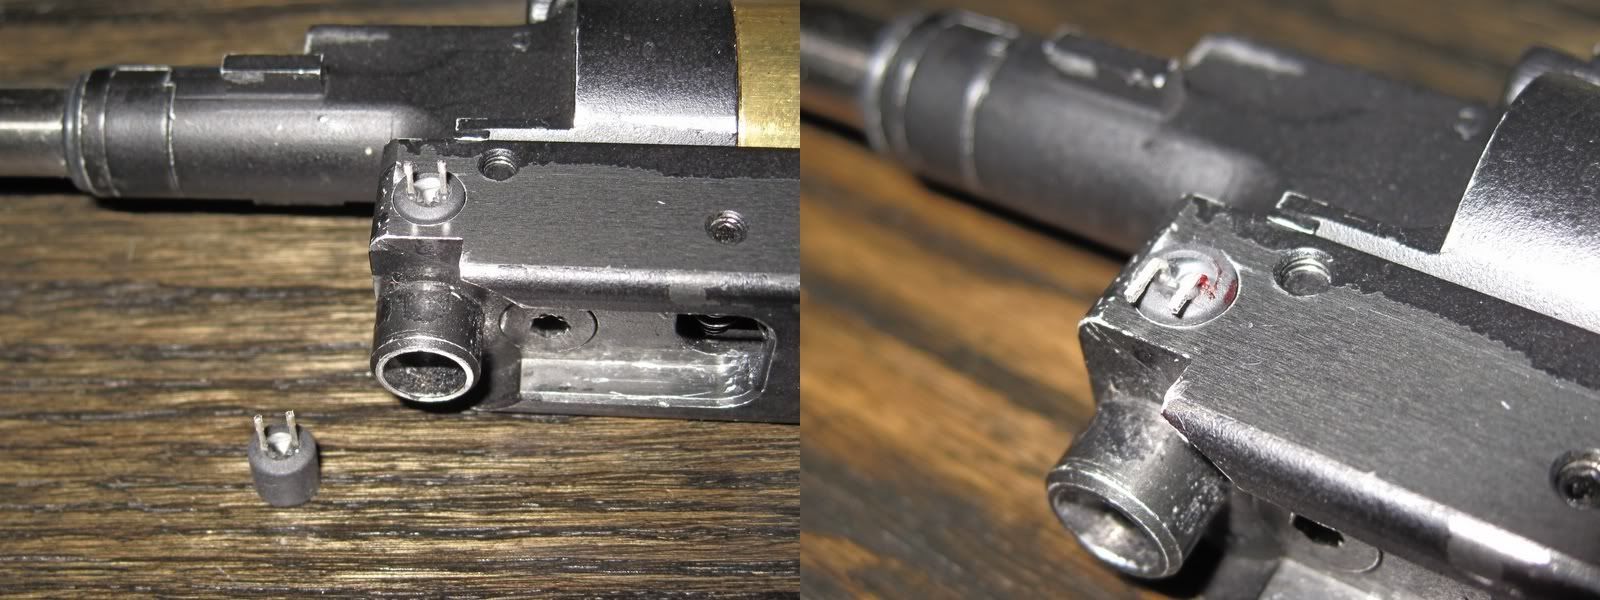
as part of my plan to be able to disassemble my gearbox without removal of the LEDs, i had to come up with a way to direct the light from the LED into the feed tube while not interrupting the feed path. since having cut down the length of the LEDs, they fit perfectly into the holes of the upper gearbox base.
now i had to figure out what to use to complete the depth of the hole in the main hopup housing so i wouldn't have BBs getting caught. i used some polycarbonate/lexan, and machined it into basically a plug to block the BBs from getting caught in the LED holes. after i had fixed them in place, i took a 1/4 endmill and cut down into the feed tube to profile the lexan to the same diameter as the feed tube. now i have a smooth feed path with lexan windows on either side where the UV light can be shined through. so far so good.
after installing the lexan into place, i could now reassemble the gearbox without any problems. the only things left was wiring it all up and making sure the wires would not get caught on anything when reassembling/disassembling my gun.
after some shrink tubing and some well placed super glue, i have all the wires tucked away quite well. the connector im using is a PC tower speaker connector. i found it to be perfect for this application as it was slim enough to fit between the gearbox and the inside wall of the mag well. now i can disconnect the wires whenever i need to disassemble my gun and not worry about wrecking all my work.
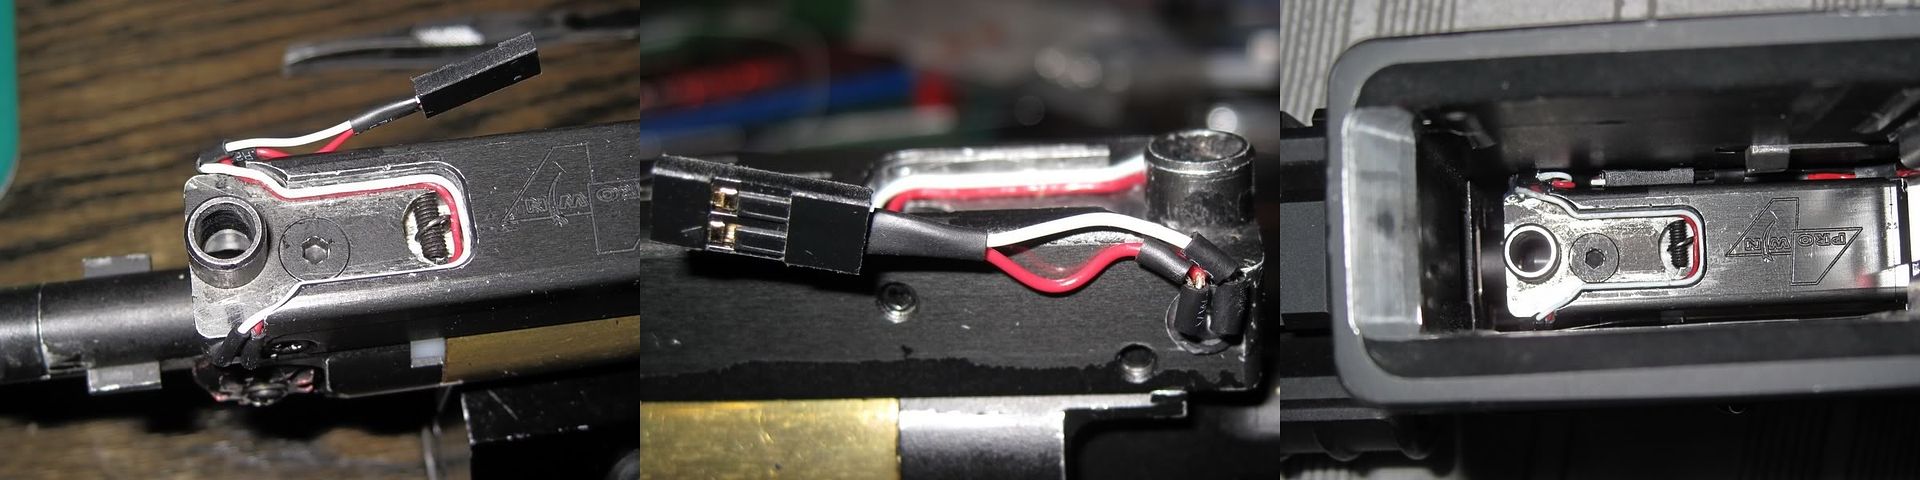
other than running down some 22AWG wires down to the motor contacts, this is just about all the work need to get this mod done. im really happy how the mod turned out this time around, and with a new Prometheus barrel i don't think i'll be having the same issues i had during Op Rhino..
now for the good stuff, VIDEO!
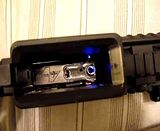
here are two videos showing the tracer mod in action. the first one shows how bright the UV LEDs are as well as how they only turn on when the gun is cycling. the second video shows the side of the AEG where some of the LEDs light is leaking through the upper/lower seam. i'll be coating the back of the LEDs with a black rubber compound to block the light as well as seal the LEDs from water.
here's a short parts list and rough cost.
50 pack 3.4v 3000cmd 5mm dia UV LEDs $16. 2 LEDs used 64 cents.
100 ohm resistor 5 cents.
shrink tube 1" long section used worth nothing really.
and maybe 12 inches of 22awg wiring (red and black)
1" square section of lexan.. couple of cents.
so i maybe spent $3 on this mod. tested it out in the dark and the BBs come out super bright. i can't wait to use this on the next 24h op.